How to install the TechnoDrive device
It is recommended to ask a distributor, manufacturer, or an expert to do the installation and commissioning.
1.1 Device Check
Check visually that all parts main and accessory are in good condition and complete.
1.Ensure the use of the right size SIM before insertion. TechnoDrive uses a Nano SIM card.
2.Ensure that the SIM card has the data services activated prior to installation.
3.Place the TechnoDrive device upside down on a flat surface. Unscrew the four screws located at the corners of the device as shown in the following picture.
4.At the back of the device, you will find two empty slots for the SIM card and the Flash memory card like shown in the following photo.
5.Insert the SIM card facing upwards in the slot at the bottom like shown in the following photo.
6.Re-screw the device shut and refer to section 1.4 for mounting in your unit.
1.Repeat steps 3 & 4 in section 1.2 for SIM installation.
2.Insert the Flash memory card facing downwards in the slot at the top like shown in the following photo.
Selecting a proper installation position is crucial for accurate event reporting; this is discussed in detail in the following points.
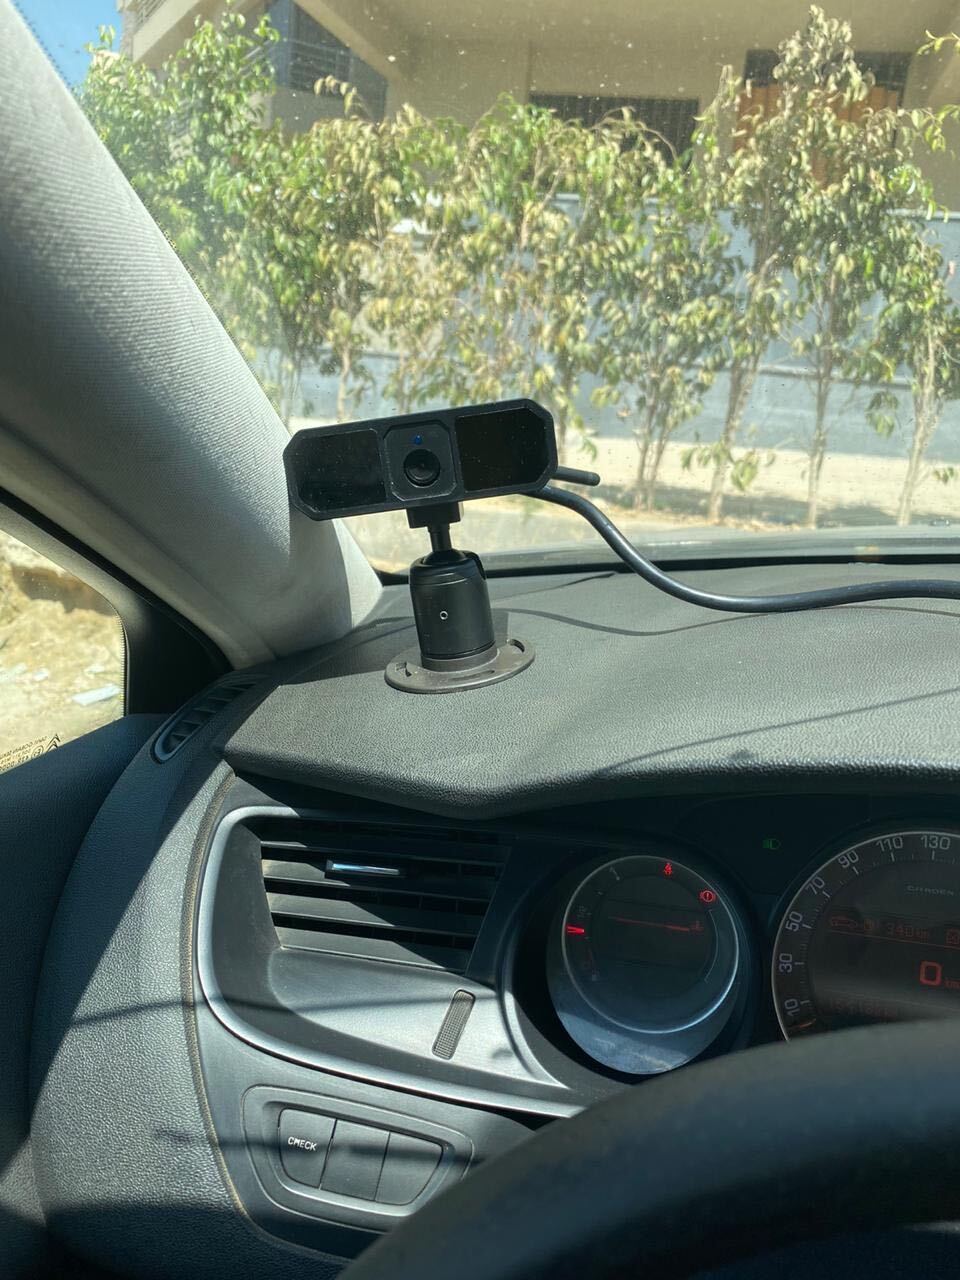
There are four parameters to positioning the DMS camera in the driver’s cabin or vehicle.
1.The Height of the DMS ideally should equal the height of the driver’s head, since this parameter is controlled by the height of the vehicle’s dashboard, the difference in height could be compensated by a tilt angle discussed in point 2.
2.The Tilt Angle of the DMS camera ideally should equal zero if the height of the camera’s position from the ground equals that of the driver’s head. Since most dashboard heights are lower, it is recommended you tilt the camera with an angle of maximum 30° upwards to face the driver’s head.
3.The Positioning of the DMS camera ideally should be parallel to the driver’s head, that is mounting the DMS camera centered directly on the dashboard behind the wheel, so that a line of sight is clear between the center of the camera and the driver’s nose. Other positions on the dashboard are possible when rotating the device with an angle to face the driver’s head.
4.The Distance between the DMS camera and the driver’s head should approximate to 80 centimeters (32 inches) to capture events effectively.
After selecting the proper position on the dashboard using the previously mentioned parameters, wipe it clean. Remove the protective film from the double face tape attached to the bottom of the DMS camera and mount it on your dashboard. It should look like the following photos.
The TechnoDrive device has one connection as an input and 3 outputs.
The first cord marked by ① is the power and input/output cord. It is the main cord connecting your TechnoDrive device to the vehicle. It is composed of 7 color-coded wires that are connected directly to the wires in the fuse box of your vehicle. The main wires are the power and ground, they are colored as followed:
1.Red is connected to Power (V+)
2.Black is connected to Ground (GND)
The rest of the wires are optional, only connect them when you want to add their functionalities which are as follows:
3.Purple is connected to Relay; connecting the relay’s wire is to activate the “stop the vehicle from starting” feature in case of theft as an added security measure.
4.White is connected to ACC; connecting the ACC’s wire is to activate the notification feature when the vehicle is in ACC before starting the engine.
5.Green, yellow and blue are connected to inputs 1, 2 and 3 respectively to activate additional custom features if needed.
The second cord marked by ② is the video1 cord, which is connected to the ADAS camera which will be discussed in Accessories Installation.
The third cord marked by ③ is the video2 cord, which is connected to the auxiliary camera. This camera is optional and not provided by SDN. However, any camera could be used as an auxiliary for added footage coverage.
1.Face the camera inward and install it to the windshield behind the rear-view mirror or to the middle of the dashboard. Wipe a selected position clean, remove the protective film from the double face tape and attach the device as shown.
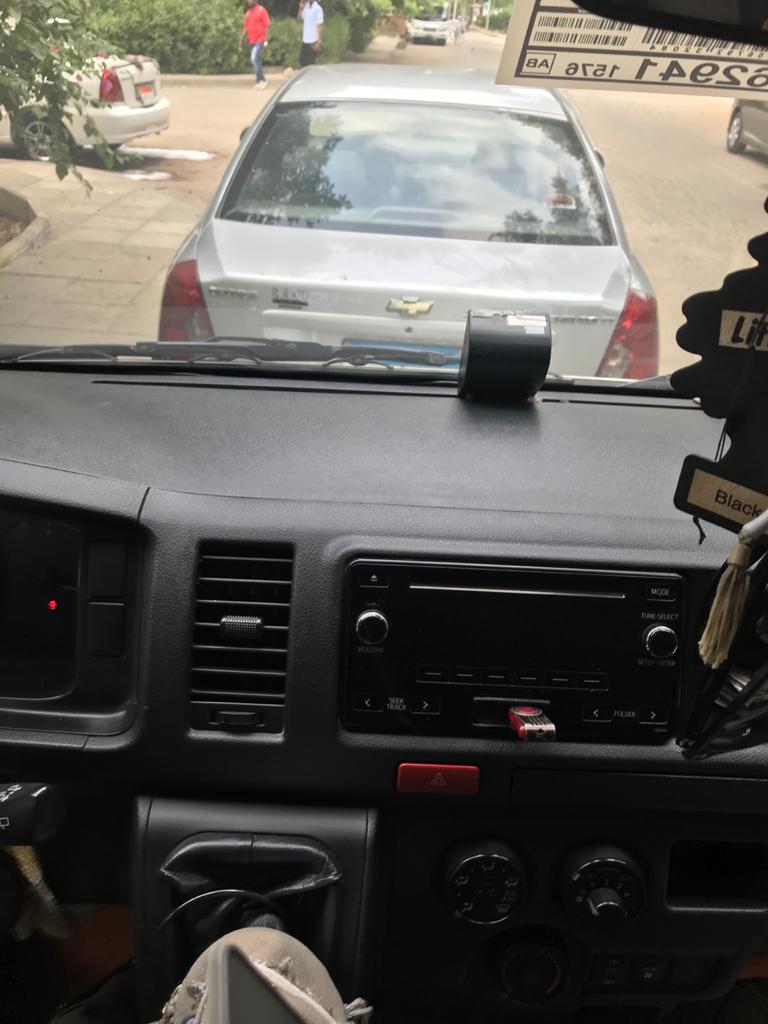
2. Attach the ADAS camera cord to one of the two video cords of the DMS, positions ② or ③ in the following picture.
1.Use the Original battery supplied by the manufacturer only. The use of any unoriginal accessories may damage the device, in which case the manufacturer will assume no repair liabilities for such damages.
2.Avoid metal objects touching the battery contacts so as not to damage the battery.
3.Do not remove the cover of the battery.
4.Do not soak the battery in water or expose it to fire.
5.It is prohibited to use batteries that are deformed, discolored, spilled, or package damaged. If such an exception occurs during use, please stop using the device immediately and contact the aftersales center for replacement.
6.It is prohibited to dismantle, modify or charge (in any other way than stated) the battery.
Related Articles
What the TechnoDrive device is and its specifications
1. Introduction 1.1 Overview TechnoDrive uses 4G QUECETEL for communication. Being composed of two cameras, the DMS camera which is mounted in the cabin to monitor the driver’s behavior and the ADAS camera which is mounted on the exterior of the ...How to use the Device Log setting in Fleet Vision mode
The Device Log is, as it sounds, a digital log for all installations and updates made to your SDN camera. It helps you keep track of new software releases, updates and all software related matters in regards to your camera device. To access Device ...How to use the Captured Events feature in Fleet Vision mode
Captured Events tab is where you can review events taken by the TechnoDrive camera device, when an event is captured, a short clip of it is recorded and tagged with the appropriate event name then uploaded to your account on the platform in the ...How to use the Fleet Performance feature in Fleet Vision mode
We know how important productivity is to your company, that is why we developed a state of the art managing system that generates data in the form of reports and statistics to help you monitor and control your fleet, and increase its productivity ...How to use the Vehicles setting in Fleet Vision mode
this feature allows you to view and control your fleet in the form of units, each unit is called a vehicle in the Fleet Vision service. you can view, add, or edit vehicles or details about previously registered ones. to access Vehicles, go to the ...